

Arduino工作講座とProcessing入門講座を通して、学習してきたことを連携させる。第1弾はLEDをプッシュボタンでオンオフする。パソコンの画面に描いたプッシュボタンをマウスで操作して、LEDのオンオフを切り替えるようにする。
この講座は少し説明を省こうと思います。中級編だと思ってください。
Arduino Processing 連携 第1弾 LEDをプッシュボタンでオンオフする
Arduino Uno と パソコンをUSEケーブルで接続して、パソコン側からProcessingを利用して操作をする。Processingの描画機能でプッシュボタンを作成。
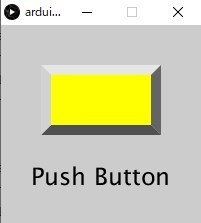
これは、Processing入門講座で作成したボタンです。3D表示されたプッシュボタンを押すと、ボタンがへこんだようになります。その動作に合わせて、内蔵LEDが点灯したり、消灯したりします。
内蔵LEDをプッシュボタンでオンオフする
Processingで用意したプッシュボタンを押した時だけ、内蔵LEDを点灯する。プッシュボタンを押していない時は、内蔵LEDを消灯する。
シリアルポートに接続している機器が一つしかないことを前提にしているので、違う場合には、ポート番号を書き換えるようにしてください。
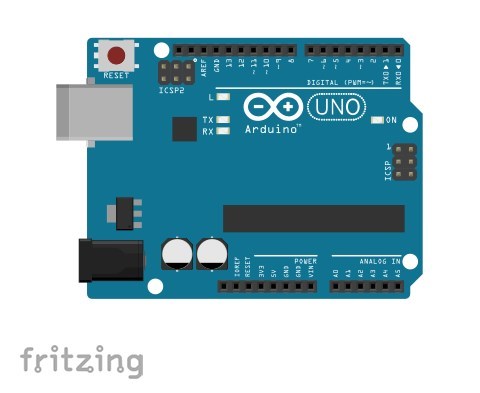
今回はArduino Uno とUSBケーブルをつなげるだけです。
必要となる部品
- Arduino Uno
- USBケーブル
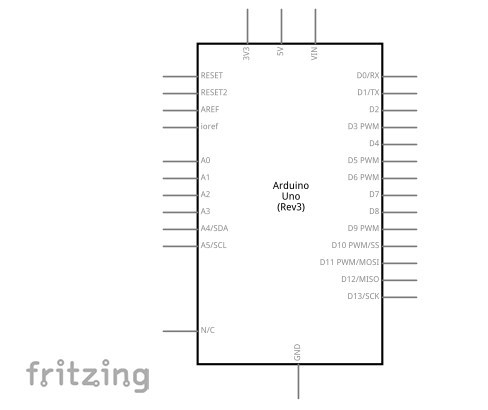
回路と回路図
Arduino プログラム
char val;                          // Data received from the serial port
int ledPin = 13;                    // Set the pin to digital I/O 13

void setup() {
  pinMode(ledPin, OUTPUT);         // Set pin as OUTPUT
  Serial.begin(9600);              // Start serial communication at 9600 bps
}

void loop() {
  if (Serial.available()) {        // If data is available to read,
    val = Serial.read();           // read it and store it in val
  }
  if (val == 'H') {                // If H was received
    digitalWrite(ledPin, HIGH);    // turn the LED on
  } else {
    digitalWrite(ledPin, LOW);     // Otherwise turn it OFF
  }
  delay(100);                      // Wait 100 milliseconds for next reading
}
事前にArduino Uno にプログラムを書きこんでおき、シリアル信号を受け付ける準備をしておく。
Processing プログラム
PBtn pbtn1 = new PBtn(50,50,100,50);

// Check if the mouse is over a rectangle and write the status to the serial port
import processing.serial.*;

Serial myPort;                       // Create object from Serial class

void setup() {
  size(200, 200);
  noStroke();
  frameRate(10);
  printArray(Serial.list());
  myPort = new Serial(this, Serial.list()[0], 9600);
  pbtn1.display(0);
}

void draw() {
}

void mousePressed(){
  if(pbtn1.areachk() == 1)
    pbtn1.display(1);
    myPort.write('H');
}

void mouseReleased(){
  if(pbtn1.areachk() == 1)
    pbtn1.display(0);
    myPort.write('L');
}

class PBtn {
  int x, y, w, h;
  PBtn (int xpos,int ypos,int wb,int hb) {
    x = xpos;
    y = ypos;
    w = wb;
    h = hb;
  }
  void display(int stat){

    int col_top;
    int col_right;
    int col_bottom;
    int col_left;

    if(stat == 0){
      col_top = 230;
      col_right = 100;
      col_bottom = 80;
      col_left = 210;
    }
    else {
      col_top = 80;
      col_right = 210;
      col_bottom = 230;
      col_left = 100;
    }

    fill(255, 255, 0);
    rect(x,y,w,h);    // center
    fill(col_top);
    quad(x-10, y-10, x+w+10, y-10, x+w, y, x, y);   // top
    fill(col_right);
    quad(x+w, y, x+w+10, y-10, x+w+10, y+h+10, x+w, y+h); // right
    fill(col_bottom);
    quad(x, y+h, x+w, y+h, x+w+10, y+h+10, x-10, y+h+10); // bottom
    fill(col_left);
    quad(x-10, y-10, x, y, x, y+h, x-10, y+h+10);   // left
    textSize(24);
    fill(0);
    text("Push Button",x-20, y+h+60);
  }

  int areachk(){
    if(mouseX > x && mouseX < x+w && mouseY > y && mouseY < y+h) return 1;
    else return 0;
  }
}
事前にパソコンのProcessingにプログラムを用意しておく。シリアルポートを調べに行き、ポート番号をチェック。調べたポートにマウス情報から、情報を発信。Processingから「H」を送ると、Arduinoの方では、LEDの対応ピンを「HIGH」に。「L」を送られてくると「LOW」にします。
Processing 実行画面
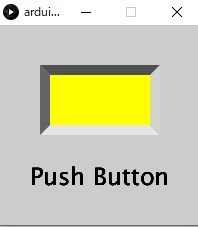
Push Button が押されると内蔵LEDが点灯し、離されると内蔵LEDは消灯する。
外部LEDをプッシュボタンでオンオフする
必要となる部品
- Arduino Uno
- 赤色LED
- 220Ωの抵抗
- ブレッドボード
- ジャンパー線 赤色と黒色
回路と回路図

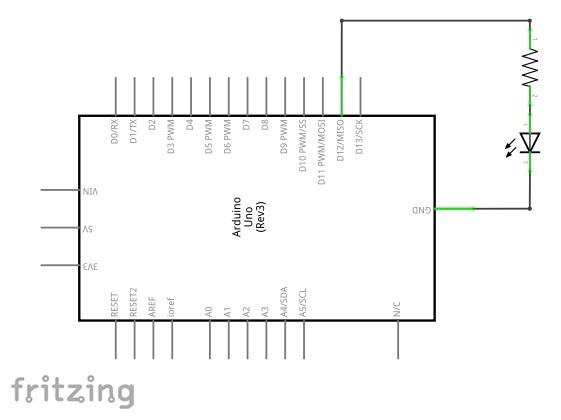
内部LEDの場合
int ledPin = 13; // Set the pin to digital I/O 13外部LEDの場合 I/Oピンの対応ピン番号を指定
int ledPin = 12; // Set the pin to digital I/O 12なんてことはない、単純にIOピンを外部LEDに接続したピン番号に変更するだけです。抵抗はいつものあれです。LEDの保護ですね。ジャンパー線は色は何色でもLEDが光ります。USBケーブルを接続してください。
電子工作では、スイッチを利用しました。Processingを利用すると、パソコンで制御することができる事ができるようになります。もちろん、他の言語でもできると思います。
今回はこの辺で。次回をお楽しみに。
コメント